Tag Archives: Recipe

January blues and Crème brûlée

It’s not boo-hoo blues, it’s that the month of January always seems to linger… It’s the month where the major holiday hype has now officially come to an end and that once glittery sparkle of the wintry wonderland is just plain over, your left missing family and friends again, plus you’ve finished all your holiday cookies…uh -oh! (Perhaps that’s just me?) I came across this article and thought it really applied too, especially with its statement on only having the will to get out of bed for nothing less than a strong cup of joe.

Recently we were experiencing fairly decent temperatures, actually getting away with 3 layers and not 5, but then we got hit with a freak snowstorm that gave us a few more inches. Lucky us, right? Adding another layer back on as we speak. How’s the weather in your neighborhood?

I don’t know about you, but I feel like the month of January really needs some cheering up! It needs some pizzazz to lead us into the giant heart-shaped month of February…Yeah! Such an occasion calls for something cheery like…..like…..crème brûlée!

I’ve never attempted to make crème brûlée before, but after watching various YouTube videos, reading, etc. I felt fairly confident that I could pull it off. Seriously, it was the best decision ever, because it turned out perfect! The best part is I get to share with you all now!

Very Easy Creme Brûlée

Ingredients:

2 cups Whipping Cream
3 large eggs
½ cup sugar (also extra for caramelizing on top)
¾ tsp vanilla extract
4 Ovenproof ramekins
1 kitchen torch

Instructions:

Pre-heat your oven to 300°F

Heat whipping cream in a sauce pan, almost bringing up to a simmer. Please make sure to stir frequently.

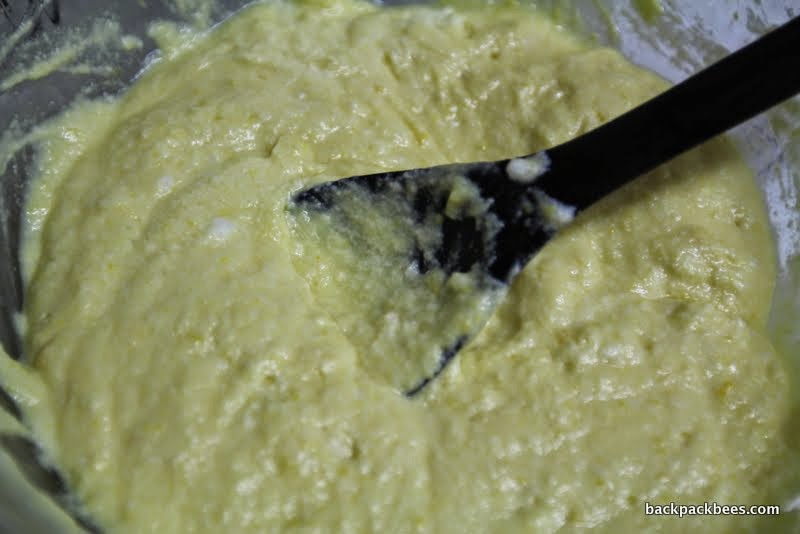
In a bowl, whisk together 3 eggs and ½ cup sugar until well blended.

Very slowly stir in hot cream and vanilla extract, so you are not left with scrambled eggs to deal with.

Next, strain mixture through a mesh sieve into something with a pouring lip. Then divide the mixture into 4 ramekins and place in a large cake pan.

Fill the cake pan with very hot water halfway up the sides of the ramekins. Carefully pop everything into oven.

Bake at 300˚F for 35 minutes. Once they are done, you will be able to tell if the brûlée is set but still has a slight giggle to it, remove ramekins from cake pan and water.

Cool the ramekins at room tempted, then place in refrigerator to chill.

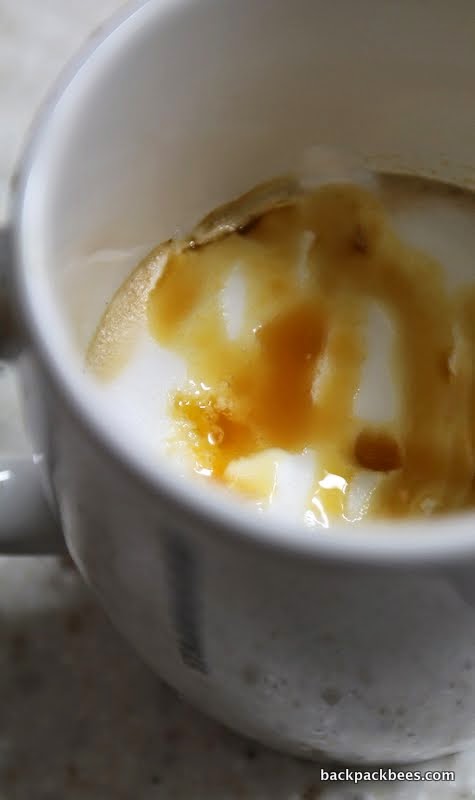
Let’s Talk Caramelization: (my favorite part)

Once brûlée is chilled, take out of refrigerator, sprinkle 1/2 to 1 tsp sugar on each custard ramekins. Then with your hand swirl to ramekins around in the air to evenly distribute and spread sugar.

The moment you’ve all been waiting for…..torch the top! Make sure to move the torch in a circular pattern until the whole surface is caramelized just as you likely . YouTube a video if this is your first time to assist with your torch confidence.

Happy eating and don’t forget to share how your creme brûlée turned out!

Backpackbees

Click, Ship & treat yourself!

Rosemary in my what?

Rosemary in my COOKIES! YESSS! If you’ve been watching our Instagram account you’ve seen that I’ve picked up some new light cookbook reads. Now…I can no longer hold it in, my current cookbook obsession is, Isa Does It: Amazingly Easy, Wildly Delicious Vegan Recipes for Every Day of the Week by Isa Chandra Moskowitz! Isa seriously has me hook line and sinker with these cookies. I turned into an instant cookie monster not even wanting to share with Mr. B. My family knows I am the first to snub most chocolate off, but the addition of rosemary to a cookie really caught my attention. Oh and guess what? IT’S VEGAN!

These cookies were perfect and in every way, just as Isa described they would be, buttery, golden, and wake your taste buds up with the exotic happy marriage of semi-sweet chocolate chips and fresh rosemary. Trust me folks, be forewarned, you are going to instantly become obsessed with these cookies too!

Don’t fret if you think it’s going to be all complicated because it’s vegan and possibly an unknown territory. It’s actually really easy and we had almost everything we needed on hand already in our kitchen. I only had to modify one partial element of the recipe and that was the coconut oil. Isa’s recipe calls for refined coconut oil, I only had unrefined but didn’t let that stop me and certainly didn’t change the taste as far as I am concerned.

Rosemary Chocolate Chip Cookies
Link directly to source: Post Punk Kitchen

1/2 cup refined coconut oil, softened (I used unrefined)
2 tablespoons lightly packed, chopped fresh rosemary (Chop it FINE)
1/4 cup granulated sugar
1/3 cup light brown sugar
1/4 cup almond milk (or your favorite non-dairy milk)
1 tablespoon ground flax seeds (golden preferred)(I used Bob’s Red Mill whole ground flaxseed meal)
2 teaspoons pure vanilla extract
1 1/3 cups all-purpose flour
1/2 teaspoon salt
1/2 teaspoon baking soda
1/2 cup chocolate semisweet chips

Instructions:

Preheat oven to 350 F. Lightly grease two large baking sheets.

In a large mixing bowl, use a fork to beat together the coconut oil and rosemary, until relatively smooth. Add the sugar, and beat for about a minute.

Add the non-dairy milk and flax seeds, and beat once again, for 30 seconds or so. Mix in the vanilla.

Add about half the flour, as well as the salt and baking soda, and mix well. Add the remainder of the flour, along with the chocolate chips, and mix well until it looks like, well, cookie dough.

Scoop about 2 tablespoons of dough onto cookie sheets in rounded spoonfuls. Flatten gently with your hands. Bake for 10 to 12 minutes, until bottoms are golden brown.

Let cool on sheets for 3 minutes or so, then transfer to cooling racks to cool the rest of the way.

Thanks for getting me through the tough times Isa!

Not only is rosemary for remembrance, as you may have read in my prior post, our friends departed Korea earlier this AM and mother Korea decided to surprise them one last time before they were on their way… SNOW! It was surprisingly a decent amount of snow that settled in below on our streets, sidewalks and trees. I love looking our windows onto the glittery white rooftops munching on a cookie.

Backpackbees

Click, Ship & treat yourself!


2015: Cheers to the New Year!

Whew! 2014 was definitely a roller coaster of a year! There were really incredibly sweet moments and memories made and then of course some doughy times too.

Along the way I’ve learned that life is like baking a loaf of homemade bread. Each single ingredient put in is vital and important because that’s what helps bake and form the loaf in the end. Sometimes in life the ingredients just don’t seem to come together correctly and you get disappointed, or discouraged. You start to think maybe I should dump this damn thing and start over, or question if was a waste of time from the beginning. But you know what? The great news is if you don’t toss in the towel and you let all the ingredients mix and knead, give a little time to bake, it ends in a great crusty loaf! I mean, come on, ending up with a freshly baked loaf of bread in my book is something to be thankful for, am I right, or am I right? Wink-Wink.

So if 2014 was a roller coaster of a year for you as well, know that 2015 might be your best mix of ingredients to come! For 2015 let’s all wake up together in the new year thanking God for giving us yet another day, a day to enjoy another slice of our fresh loaf!

With that being said, who is popping by for some freshly baked whole-wheat honey cinnamon raisin bread? If you can’t make it we highly recommend using some of that Christmas dough on a swanky bread machine like we did (Psstt… IT’S ON SALE TOO!) I don’t think that we will ever purchase another loaf in the store unless in a pinch. Thank you Williams-Sanoma.

Here’s to the greatest mix of ingredients to come!

Happiest of New Years to you and you and of course you!

Honey Whole-Wheat Cinnamon Raisin Bread
Source: Breville Food Thinkers
Makes one 1.5-pound loaf
Ingredients:
1 cup warm water
3 tablespoons honey
1 1/2 tablespoons unsalted butter cut into 1/2-inch pieces, room temperature
1 1/4 teaspoons salt
1 1/2 cups bread flour
1 1/2 cups whole wheat flour
3/4 tablespoon ground cinnamon
2 3/4 tablespoon milk powder
1 3/4 dry active yeast

Add to the fruit and nut dispenser: 1/3 cup raisins

Instructions:
Ensure the collapsible paddle is attached in the bread pan and is in the upright position.

Add the ingredients to the bread pan in the order listed above, then secure the bread pan into the bread machine.

Place the raisins in the fruit and nut dispenser. Select the Whole Wheat setting, the desired crust color, and the 1.5-pound loaf size, then press start.

When the entire cycle is complete, use an oven mitt to remove the bread pan from the machine via the handle, and allow this to cool before removing the bread from the pan. The bread will slice best once completely cooled.

Backpackbees

Forgiving Fourways

You guys, my Amaryllis belladonna bloomed again over night! Check it out! I’m like a giddy child on Christmas when I wake up rub my sleepy eyes these past mornings and roll out to the living room and see this happy little guy in all it’s glory! I stopped by Cafe Jerry’s to see how hers was doing too…not to shabby, not to shabby. Little thing in life we cherish.

This morning I woke up and knew I wanted to do something special for Kelsey, let’s just say life hasn’t given her forgiving fourways lately. For those of you not in Korea, I know you’re wondering what this silly gal is rambling on about, so I’ll share. In S. Korea while driving if you cut someone off, make a left turn from the right lane of traffic, or do any other really outlandish driving, it’s absolutely okay! Why? Because all you need to do is hit the forgiving fourways (hazards), all is instantly made right again and all parties drive on. Oh Korea.

Anywho, when life gives you lemons make Rachael Ray’s lemon ricotta pancakes! Throw in a side of turkey bacon, fresh berries and a refreshing bubbly raspberry lemonade. Mmmmhmmm! Got your attention? Thought so. This recipe was used recently by a friend for a birthday breakfast celebration with rave reviews. Those reviews were spot on! Happy belated birthday Kara!

Oh, it doesn’t hurt when the coffee barista, Mr. B, comes right to your home and makes you a perfect caramel machattio to sip on while your whipping up your lemony goodness.

Lemon Ricotta Pancakes

Taken directly from Rachael Ray’s Recipe Here

Ingredients:

6 eggs, separated
2/3 cup self-rising flour
4 tablespoons lemon zest
3 cups ricotta
5 tablespoons sugar
4 tablespoons butter

Directions:

In a large bowl, whisk egg yolks, flour, 3 tbsp. zest, 2 cups ricotta and 3 tbsp. sugar. In another large bowl, beat egg whites until stiff; fold into batter. On griddle, cook pancakes in butter over medium until golden, 3 minutes per side. In medium bowl, whisk remaining ricotta and sugar. Top pancakes with ricotta mixture and remaining zest.

Backpackbees

Angry Shrimp

Funny story….we thought these shrimp were really ANGRY after we cooked them one night last week. Yes, so much so we thought we had food poisoning from these bad little as$ suckers. No bueno! After a reallllyyyyy rough weekend we Bees are recovering slowly but surly.

I felt like Monday morning came way to fast and way to early today. I picked myself out of bed and went to work all responsible like, only to find out my co-worker came into the office incredibly ill and showing the same symptoms that we had over the weekend. AHH! Attack of the angry shrimp? Nope, he didn’t have any of our angry shrimp. Ohhhh noooo even worse, STOMACH VIRUS! Yep! Ew!

Well now that I’ve been living on toast, tea, slowly transitioning over to soup and graduating onto a grilled cheese sandwich, I think it’s time to share the angry shrimp recipe with all of you. Not to mention that it’s a little victory to even be able to fathom the very thought of anything food related after this weekend.

Pair with a nice cool simple cucumber salad and keep those hands washed!

Enjoy!

Angry Shrimp
Slightly altered from: Epicurious

Ingredients:

2 tablespoons pepitas
1/2 cup golden raisins
2 tablespoons olive oil, divided
3/4 cup diced white onion
1/4 cup dried cherries, chopped
2 teaspoons chipotle powder
4 teaspoons chopped garlic, divided
1/2 teaspoons ground cumin
1/2 cup Triple Sec liqueur
20 ounces low-sodium chicken broth
1 tablespoon cornstarch
2 pounds medium-large shrimp, peeled and deveined, thawed if frozen
1 tablespoon orange zest
6 cups leafy spinach, chopped
3 cups cooked brown rice

Instructions:

In a small pan over high heat toast the pepitas until lightly brown, 1 to 2 minutes. In a food processor or chopper, puree raisins and 1/4 cup water 1 minute. In a large pan over medium heat, heat 1 tablespoon oil. Add onion and cook about 4 to 5 minutes. Stir in raisin puree, cherries, chipotle, 1 teaspoons garlic and cumin; cook 1 minute. Add in Triple Sec and cook, stirring, until alcohol is cooked out about 1 to 2 minutes. Add chicken broth and bring to a boil, then reduce heat and simmer. In a separate bowl, dissolve cornstarch in 1 tablespoons cold water. Slowly add in cornstarch mixture to broth mixture to thicken. Reduce heat and simmer mixture 10 minutes. Add in shrimp and cook about 5 minutes, or until pale white. Stir in fresh orange zest; season to taste with salt and pepper. Transfer shrimp to a covered bowl and set aside. Lastly, in a pan, heat remaining 1 tablespoons oil. Cook spinach and 3 teaspoons garlic, make sure to stir until spinach starts to wilt, this will be about 3 to 5 minutes. Strain all spinach juices and combine in with brown rice. Plate rice mixture and top with those angry shrimp.

Backpackbees

Cravings

It’s 9:30PM at night and Mr. B say’s, “Let’s make pretzels”… translation… Can you make pretzels? Cravings like a pregnant lady this man has. Nonetheless, it’s fun and a lot of really fun and crazy recipes come from his cravings. So tonight, pretzels it is…

I came across this recipe awhile back when flipping through a magazine subscription that my grandma got me last Christmas, Country Living. I clipped it out and thought it would be perfect for someday down the road. I don’t know about you, but I clip and favorite so many recipes with high hopes to try someday, but often someday doesn’t come for years. So when I do finally dust off the clipped or favorited recipe I am ecstatic that I finally reached someday!

The pretzel recipe might look like it’s intimidating but really it’s not. The only real tedious part, well if you can even call it tedious, is waiting for the dough to rise. I always do a happy dance when my dough rises as it should for recipes. There is nothing worst than waiting an hour or two on dough only to find out that something went terribly wrong with the yeast. I know all of you bakers out there can relate with that statement.

These aren’t Annie Ann pretzels but they certainly do suffice the Mister’s cravings. 24 pretzels for two people…can I interest anyone in a late night pretzel?

Pretzels with Brown-Sugar Rosemary Dijon
Recipe by: Country Living

Ingredients

(Pretzels)
3 Tablespoon(s) honey
1 1/2 Package(s) (about 3 1/4 teaspoons) active dry yeast
5 1/4 Cup(s) all-purpose flour, plus at least another 1/2 cup for kneading
3/4 Cup(s) whole-wheat flour
1 1/2 Teaspoon(s) fine salt, plus a pinch for egg whites
6 Tablespoon(s) olive oil, plus more for coating bowl
6 Tablespoon(s) baking soda
2 Large egg whites
3 1/2 Tablespoon(s) coarse sea salt

(Mustard)
4 Tablespoon(s) light-brown sugar
2 Tablespoon(s) finely chopped rosemary
2 2/3 cup(s) Dijon mustard

Directions

In a medium bowl, combine 1 tablespoon honey, yeast, and 2 1/4 cups warm water (100 degrees F), and stir until yeast dissolves; let sit until foamy, about 5 minutes.
Meanwhile, in a large bowl, combine flours and fine salt. Using a wooden spoon, stir in the oil, yeast mixture, and remaining honey until a shaggy dough forms. Sprinkle 1/2 cup flour on your work surface; then transfer dough to surface and knead, adding up to 1/2 cup more flour as needed, until dough becomes supple and elastic.

Coat a large, clean bowl with olive oil. Place the dough in the bowl, and cover with a towel. Let rise in a warm place until dough doubles in volume, about 1 hour.

Line 2 baking pans with parchment and set aside. Punch dough down and knead for 5 minutes. Divide dough into twenty-four 1 1/2-ounce pieces (each slightly larger than a golf ball) and keep covered. Working with one piece at a time, roll dough into a 14-inch-long rope. Bring both ends together and twist twice near the top. Fold ends down so they sit atop the bottom loop of dough; press ends into loop to form a pretzel. Transfer to a prepared pan and repeat with remaining dough. Let pretzels rest for 15 minutes.

Preheat oven to 400 degrees F. Meanwhile, in a medium pot, bring 6 cups water and baking soda to a rapid simmer. Working in batches, poach pretzels for about 15 seconds on each side. Return to prepared pans. Lightly beat egg whites with a pinch of fine salt. Then lightly brush pretzels with the egg-white mixture and sprinkle with coarse salt. Bake until pretzels are deep brown and cooked through, about 15 minutes. Transfer to a wire rack to cool completely.

To make the mustard: Stir light-brown sugar and finely chopped rosemary into Dijon mustard.

(The dipping mustard is key!)

Backpackbees

FFE

FFE= Fuss free and easy! Two items that we Bee’s look for in a recipe after a long day of work. We’ve been on a fish kick lately. I must confess, I have been loving every savory second of it too. Mr. B is getting quite creative with seasoning and such. I mean honestly, does anyone else out there not ever get sick of fish?

Cod. Eh, cod doesn’t come across as a fancy pants fish, right? Wrong. Cod can delicious served simple or jazzed up with all sorts of fun ingredients. Tonight we jazzed up our cod by poaching and using ingredients such as sassy saffron and white wine.

Poached Cod with Tomato and Saffron
Recipe Adapted from: Bon Appétit

INGREDIENTS

2 Tablespoons olive oil
2 Cloves minced garlic
1 Teaspoon Aleppo pepper or ½ crushed red pepper flakes
Chopped handful of fresh vine ripened tomatoes and fresh cherry tomatoes, boiled down
¼ Cup dry white wine
2 Bay leaves
Pinch of saffron threads
Kosher salt and freshly ground black pepper
4 5-oz. Skinless cod fillets
2 Tsp crushed red pepper flakes

Instructions:

Heat oil in a medium skillet over medium heat. Add garlic and Aleppo pepper and cook, stirring often, until fragrant (garlic should not take on any color), about 3 minutes.

Add chopped fresh tomatoes, crushing with your wooden spoon as you add them, wine, bay leaves, saffron, and ½ cup water. Bring to a boil, reduce heat, and simmer until flavors meld and until tomato skins peel off while string gently. Season with salt and pepper.

Reduce heat to medium-low; season cod with salt and pepper and place in skillet. Cover and cook at a bare simmer until cod is opaque throughout and beginning to flake, 5–7 minutes (thicker pieces will take longer to cook).

Gently transfer cod to shallow bowls and spoon poaching liquid over.

Backpackbees

You Asked For It

Did you know that dopamine levels rise in your brain when you try new foods? All the more reason to broaden your inner foodie horizons, right?

Someone mentioned in passing that they missed out on seeing what we’ve been concocting in the Bees kitchen lately. Yes, I admit…there has been a teeny bit of neglect with blogging since getting back from Malaysia. To be fair, I blame summer and the evening walks we’re taking advantage of before monsoon season really settles in. Nevertheless I’ve been taking photos of the delicious foods and things we’ve been up to, just purely neglecting to go the extra mile to upload them and write a post. I know you’ll forgive.

Boy do we have a treat to share from one of our favorite blogs. So let’s get on with it and kick off the very middle of this week the right way!

www.greenkitchenstories.com. Check them out!

Warm Cauliflower ‘Couscous’ with Green Peas & Herbs
Recipe by: GKS
Ingredients:
1 head of raw cauliflower
2 handfuls mixed parsley and basil
1/2 cup pumpkin seeds (pepitas)
Juice of 1/2 lemon
A drizzle cold-pressed olive oil
sea salt and black pepper
2 cups frozen (thawed) or fresh peas
1 cup feta cheese, crumbled

Directions:

Bring a saucepan with water to boil. Meanwhile coarsely chop the cauliflower and place the florets and stem in a food processor or blender and process until fine couscous- or rice-like texture. Do it in batches if you have a small food processor. Pour the cauliflower into the boiling water, lower the heat to simmer and cook for about 3 minutes. Meanwhile finely chop the herbs, toast the pumpkin seeds in a skillet on low-medium heat until golden. Drain the cauliflower ‘couscous’ in a sieve and place in a large serving bowl. Add herbs, lemon juice, olive oil, salt and pepper and combine everything. Add peas, pumpkin seeds, crumbled feta cheese and toss until mixed. Garnish with sprouts or micro greens. Serve warm or chilled. Keeps for a couple of days in the fridge.

Eat the “couscous” on its own, or it makes a very nice paring to some homemade breaded cod. Just curious, what do you think? Do you think you will try the recipe? What do you think you will pair the dish with?

Stay tuned for some more delicious recipe ideas.

Backpackbees

Where’s the Meat?

When I eat burgers not made with meat I often think back to my childhood and giggle. It was a summer month and I was with my dad vacationing on Nantucket Island visiting my aunt and uncle. My aunt’s sister’s husband prepared us all eggplant burgers. It was the first time that I had ever tried anything with the title burger not consisting of meat. I immediately fell in love with the burger and raved about it to my grandparents once we returned home from vacation. I proudly exclaimed, “I ate a burger, loved it and it wasn’t even made of meat!” I am sure at that point I confused my grandparents with my statement and had to elaborate. Nonetheless, I know whatever they kindly responded with at the time to appease me, they were thrilled that I was open to trying new things and loved my vegetables so much.

These days you cannot keep me away from my vegetables. I try to incorporate as many fresh ingredients into our meals at home during the work week. The weekend…yeahhh..those are more of our cheat nights. Hey! we all need our cheat days to keep sane.

After crazy days of work there isn’t anything more that I look forward to than cooking in our kitchen, just Mr. B and I. I love how creative we get never knowing what concoction we might whip up. I love the moments of when he gets excited to have me try a new sauce he’s made. It takes the edge off the day. Cooking together and being in the kitchen releases tension, worries and stressors that might be plaguing me at the moment. I often think of my in-laws home where everyone always gathers in the kitchen, always such a homey and welcoming environment.

Tonight’s meal I am sure you guessed revolves around a meatless burger, a portobello burger with swiss cheese and caramelized onions sided up nicely with oven roasted crinkle cut sweet potato french fries.

Portobello Swiss Cheese Burgers with Caramelized Onions

Source: Prevention Cookbook

Ingredients:

2 Tsp. olive oil
1 Medium onion, thinly sliced
1 Tsp. sugar
1 Tbsp. balsamic vinegar
4 Portobello mushroom caps
⅛ Tsp. salt
¼ Tsp. freshly ground black pepper
4 Slices Swiss cheese, for each mushroom
4 Buns of choice

Directions:

In a nonstick skillet over medium-high heat, heat 1 tsp. of oil. Add onion and sugar and cook, stirring occasionally, about 5-6 minutes or until lightly browned. Remove from heat.

In a separate bowl, combine vinegar and remaining oil. Brush over mushroom caps and sprinkle with salt and pepper. Grill, covered, turning occasionally, about 9-11 minutes or until tender. Top each mushroom with slice of cheese and continue to grill about 1-2 minutes or until cheese melts. Transfer to plate and keep warm.

Top off bun with 1 mushroom and caramelized onions. Repeat for dinner guest and eat!

Backpackbees

Pan Seared Tuna Steaks

Well Helloooooo there dinner!

Doesn’t this tuna steak look incredible? Simply mouth-watering, juicy and tender! Yum!

The great thing about this meal is that it all happens quickly, in one pan! (As the party typically responsible for nightly dish duty, this rocked my socks off).

Think only a few minutes to prepare and cook then enjoy! Plus, it is such a healthy option and ideal for a light evening dinner.

Mr. B pan seared these steaks on the stove top in our cast iron pan in a little oil and sprinkled reasonably with blackened old bay seasoning. Turn with a spatula or tongs when the color change shows about 1/4th of the way up the steak, cook the same amount of time of the back side, about 15 minutes.

Don’t forget to pair with a perfect side like some bok choy too!

Have any good tuna steak recipes to share?

Backpackbees