Tag Archives: quick

Bananas

Man do we love banana bread!

Banana bread is just SO easy to whip up, and to be completely frank, we always seem to have two bananas lying around from the bunch that are on their last leg. It’s almost like the food gods are telling us to just reserve those two just for the excuse to bake up a fresh loaf. Haha! Okay… Maybe not… but it is a great excuse right?!

I find that with banana bread I’m always challenging myself to make it differently each time. A tweak here, an addition of this ingredient there, etc. Heck sometimes I just open up our cabinets and throw whatever I can get my hands on into the batter.

But for blogging and sharing sake, I actually typed out quickly what went into this loaf.

Are you ready? (“Because this shi* is bananas!”) SORRY! Couldn’t resist!

I decided a banana bread would pair well with coconut….so that’s just what I did…. And my predictions were spot on! Don’t you just love when that happens? Yeah, me too!

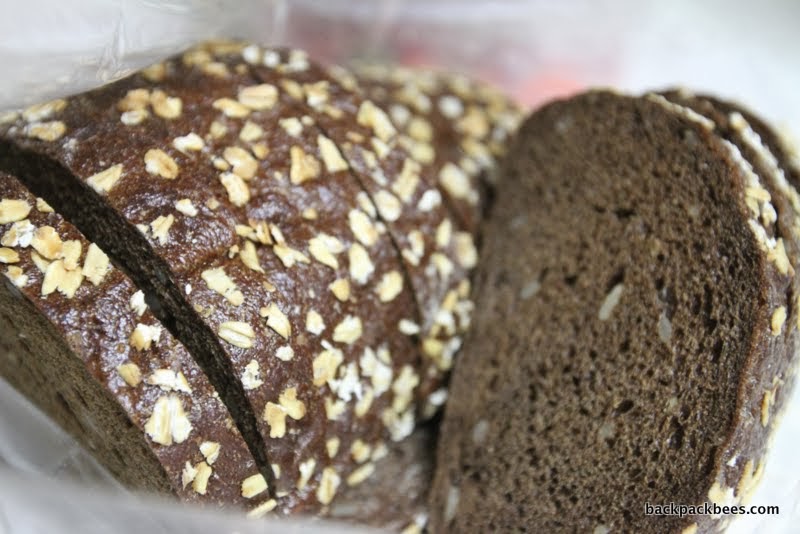
Before popping into the oven, I topped the bread off with a little mixture of sweetened and unsweetened shredded coconut flakes for that additional flaky texture, man was it a game changer! Mr. B couldn’t resist topping his with homemade whipped cream left over from a cake I made.

If you bake a loaf, let me know what you think!

Coconut Banana Bread
Makes one loaf

Ingredients:

2 very ripe bananas, peeled
1/3 cup melted coconut oil
3/4 cup coconut sugar
1 egg, beaten
1 teaspoon coconut extract
1 teaspoon baking soda
Pinch of salt
1 1/2 cups of all-purpose flour
1/2 cup coconut flakes mixture of sweetened / not, reserve 2 Tablespoons for topping

Instructions:

Preheat the oven to 350°F (175°C), and grease or butter a 4×8-inch loaf pan.

In a mixing bowl, mash ripe bananas with a fork until they are smooth. Stir the melted coconut oil into the mashed bananas.

Next, mix in the baking soda and salt. Stir in the coconut sugar, beaten egg, and coconut extract. Mix in the flour and shredded coconut flakes.

Pour the batter into your prepared loaf pan. Use reserved 2 Tablespoons of shredded coconut by sprinkling over the top of the loaf. Bake for 1 hour (check at 50 minutes, depending on your oven) at 350°F (175°C), or until tester inserted into the center comes out clean.

Remove from oven and let slightly cool. Slice and serve!

Backpackbees

Kimchi Grilled Cheese

Did I just lose you with the title of this post? Are you making a face? Be honest….

I realize using the two words kimchi and cheese together in a sentence must sound utterly disgusting to my friends and family, but I promise…it’s really not. I mean I think of all the bowls of budae jiigae we consume here in Korea and without the square slices of cheddar cheese it just wouldn’t be the same. I’ve had kimchi carnitas fries,  kimchi quesadillas, and now a kimchi grilled cheese. Not just any cheese, make it pepper jack pretty please.

I think I just might have died and gone to heaven.

Kimchi Grilled Cheese Sandwich

Ingredients:

2 Slices of your favorite bread, I typically pick up something fresh from a local Korean bakery (Today it was named healthy loaf?)
2 Slices of your favorite cheese, I used pepper jack… cheddar would be an excellent pairing as well
1/8 Cup Mat kimchi, chopped
1 tablespoons butter, divided to butter your bread

Super simple and whipped up in a snap!

….Wait, do you think we’ve been in Korea to long? ….Nah!

Would you try out this slightly different grilled cheese combination?

Backpackbees

Pan Seared Tuna Steaks

Well Helloooooo there dinner!

Doesn’t this tuna steak look incredible? Simply mouth-watering, juicy and tender! Yum!

The great thing about this meal is that it all happens quickly, in one pan! (As the party typically responsible for nightly dish duty, this rocked my socks off).

Think only a few minutes to prepare and cook then enjoy! Plus, it is such a healthy option and ideal for a light evening dinner.

Mr. B pan seared these steaks on the stove top in our cast iron pan in a little oil and sprinkled reasonably with blackened old bay seasoning. Turn with a spatula or tongs when the color change shows about 1/4th of the way up the steak, cook the same amount of time of the back side, about 15 minutes.

Don’t forget to pair with a perfect side like some bok choy too!

Have any good tuna steak recipes to share?

Backpackbees

Baked Almond Coconut Curry Crusted Tilapia

Poor tilapia. It’s often passed by in the store for its tasty sea cousins salmon or tuna. It’s never really the star of the show. Why? I have no idea… It’s such a wonderful little white fish. It’s so versatile, healthy, quick and easy to make, and best of all cheap, cheap, cheap!

Are you a fan of fish? Most people reply “yes, as long as it does not have the fishy taste to it.” Touché. Me, I could eat fish every day if I could. It never gets old! So many ways and unlimited possibilities to marinate, grill, bake, sear, broil, eat raw…. Yum, Yum, and YUM!

Tonight tilapia was the show stopper at our house for dinner. Plus, if you were one of those people that do not dig the fishy taste, or are new to eating fish, I have an excellent recipe below to share with you.

Baked Almond Coconut Curry Crusted Tilapia

Recipe slightly adapted from FamilyFreshCooking

Ingredients:

4 Thawed Tilapia filets
1 TSP Curry powder
1/4 Cup Unsalted Almonds
1/4 Cup Unsweetened Coconut Flake
Ground fresh black Pepper to taste
Coconut oil

Directions:

Pre-heat oven to 190 degrees Celsius. lightly coat pan with coconut oil. Pulse in food processor the almonds, coconut flake, curry, and pepper to taste. Coat tilapia with coconut oil then dredge fish in the curry powder, almonds, and coconut flake mixture, as you would with breadcrumbs.

Once in baking pan, sprinkle a few pinches of the unsweetened coconut and curry powder on top of the fish already coated with the above mixture.

Bake 20-25 minutes. Test tilapia to ensure cooked through & flakey.

Enjoy! Please feel free to let me know what you think.

Backpackbees