Author Archives: Backpackbee

Shop Local: Avenue Flower

You know me, I’m always out and about in search of a great new find. Tonight I think I’ve found another great little gem to add to my collection. A locally owned flower shop!

I know what you are thinking…another flower shop… what is the big deal? The big deal is that to me finding the perfect little local flower shop is like drinking a tall glass of straight happiness concentrate! There is just something about the feelings I get when going into locally owned flower shops, local farmers’ markets, and even perusing the floral section of grocery stores to see what’s in season. Have you sipped on that same Kool-aid and can relate to the feeling?

The owner is young and super sweet, but don’t let her age fool you into thinking she’s inexperienced. The hand tied flower arrangements are gorgeous and stylish! She’s turning out some modern and hip bouquets, baskets, wreaths, teaching arrangement classes and has a nice following of customers buzzing in and out of her shop too. I cannot even express how refreshing it is to not see just some baby’s breath or basic carnations thrown together for some astronomical price.

Speaking of price, just name it and pick out a few flowers that you’d like to base the arrangement around and she will work her magic.

^ Above is my flower arrangement and below is the sweet purple flower that she threw in for service.

Backpackbees

Address: Avenue Flower 410-1 Jinshan Plaza 1F Uijeongbu Minrakdong
Phone: 070-4173-1633
Website: Here

South Korea: Lunar New Year!

새해 복 많이 받으세요, Happy Lunar New Year all!

It’s crazy to sit here and realize that this is our 4th and 5th Lunar New Year in Korea. Honestly, WHOA! Anywho I’m sure if you’ve been following along with our blog from the beginnings you know what Lunar New Year is all about. FOOD! Kidding… well kinda, sorta. It’s about family and being together, much like our own special holidays in the US. And FOOD.

So to celebrate Lunar New Year, why not get festive and gather up your friends and teach them how to easily make dumplings? Just remember two magic words, fill and fold and the rest will come into place for you. The great thing about dumplings is that you can be as basic, or crazy creative with the filling ingredients as you’d like and they will still be delicious. This time around we kept ours fairly simple, easy to follow and vegetarian.

Remember…Confucius say, “Man with one chopstick go hungry.”

Enjoy!

^If you are in Korea these bamboo steamers and steamer liners are EASY to get a hold of. If you can’t find any liners, use some cabbage leaves and call it a day.

Easy Steamed Dumplings

Ingredients:
About 15 shiitake mushrooms, or your favorite kind, sliced
1/2 of a small onion, sliced
EVOO- Extra virgin olive oil, used to drizzle
1 Cup shredded carrot
1 Cup shredded cabbage
3 Inch slices of fresh ginger, diced
3 Cloves garlic, diced
1/2 Cup of mixed yellow, red and green bell pepper, diced
1/2 Of a block of tofu, diced into small squares
1/4 Cup chopped scallions
4 Tsp soy sauce
4 Tsp hoisin sauce
2 packs of wonton wrappers
Salt & pepper, to taste

Instructions:

Preheat the oven to 450 degrees. Combine the mushrooms and onions onto a baking sheet and drizzle with EVOO and sprinkle with salt and pepper to taste. Roast in oven for approximately 10-15 minutes, checking for a nice golden brown coloring. Remove from the oven and allow them to cool.

After the mushrooms and onions have cooled, combine all of the dry ingredients and add in a pinch of salt. Add in the sauces and toss together.

You want to fill the wrapper with about a tablespoon scoop of the mixture. You will know if it is to full by the way it’s folding together for you. Take your finger, wet the outside edges of the wrapper with a bit of water and begin to pinch and fold edges completely closed, as shown on the wrapper instructions.

Place the dumplings inside and steamer for approximately 9-10 minutes, or until the wonton skins are soft.

Backpackbees

Click, Ship & treat yourself!

Seoul: TWG Tea

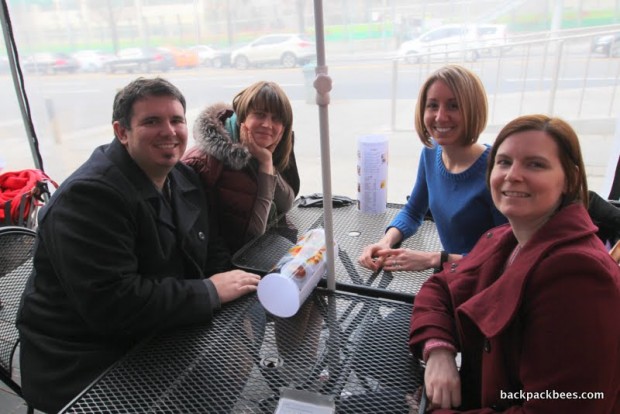
I invited some friends to join me on Valentine’s Day for afternoon tea and sampling delectable little delights from TWG- The Wellness Group. This visit to TWG has been a long time coming and FINALLY is getting crossed of my Seoul bucket list. Plus I’d never live it down if I went without my British gal-pal and posted this review.

TWG officially opened its flagship store and terrace in the Seoul district of Cheongdam, South Korea around this time last year in 2014. The two-story TWG Tea Salon and Boutique and outdoor terrace has over 800 varieties of teas from over 45 regions around the world. I felt like I drank all of those teas too as I swam later that afternoon to the subway. HA-HA! Black tea, green tea, white tea, iced-tea, tea-shakes, Christmas tea…you name it.

I have become obsessed with a very light tasting tea, WHITE HOUSE TEA . The tea is described as an ethereal white tea with fruits and fragrant roses, that leaves an enduring aftertaste of ripe berries. A diplomatic and balanced tea of sophistication. It is delightful!

The menu was slightly overwhelming and just unfolded and unfolded across our table, but I’m not complaining. It was rather hard to choose especially when they all have ridiculously sweet little names like Silver Moon, lovers tea, Happy tea, Jade Dragon and Weekend in Casablanca. Hands down I am a newer fan of coffee, but I feel like coffee would never get away with such cutesy little names.

Being a foodie I was instantly intrigued with the food at TWG. I had done some research and found that TWG offers many food items that are tea-infused to include tea-infused ice-creams and sorbet. YUM! Even our little rolls were tea-infused!

^ fresh mushroom butter

We decided to share and ordered Lasagna with bolognaise ragout with their signature homemade tomato and fresh basil sauce infused with Moroccan Mint Tea, and a seared tuna salad. We ended the meal with tea service complete with clotted cream, Geisha Blossom Tea Jelly (This stuff is AMAZING and I tried to purchase but the Seoul district doesn’t sell it. boo.), macaroons, scones and all! Overall we thoroughly enjoyed the food and felt it was worth the price. We all decided we will return again to treat ourselves and of course try another round of teas.

I don’t even think that Alice herself could have had more fun at The Mad Hatter’s Tea Party! Pinkies up!

Backpackbees

Address:

TWG Tea at Cheongdam, Seoul
82-1 Cheongdam-Dong, 1F, 2F, Gangnam-Gu, Seoul Korea
Tel: + 82 (0)2 518 1837
Opening Hours:
Monday – Sunday, 10.30am – 10pm
Menu: Here
Website: Website Here

Click, Ship & treat yourself!

Backpack Bees First Annual Supper Club

The only thing that seems to be regular around here is my lateness in blog post lately. EEK! So what have you been up to and what in the world have we been up to? Well, I can fill you in on us and you’ve got to leave us some comments below on you. Lets see… Ah! We hosted our first annual supper club at our place last weekend.

Yup, we gathered up 7 sort of strangers around our wooden table in our cozy little South Korean apartment, added a touch of good tunes- mind you it has to be an excellent mix, had oodles of laughs, kept the wine glasses filled, took a heavy dose of creativity and openness from both the host and the supper club goers.. and welcome to the Backpack Bees first annual supper club! (Sounds like the opening of the The Real World , right? LOL..Na…nowhere near as dramatic).

We had these bigger than big ideas to whip out our KitchenAid Ravioli Maker and make homemade ravioli. Pretty awesome, right? Right and it was! Let’s fast-forward to the actual day of the supper, when we quickly realized we had never even used our ravioli attachment… oops.. How hard can it be? I mean we used the pasta attachment for spaghetti before. Easy-peasy!

HA-HA..well in the end the pasta came out delicious but I’ll keep it real and give you the backside of the story. Mr. B whipped up an excellent homemade tomato sauce and the ravioli vegetarian filling (ricotta, spinach and shiitake mushroom). Then moved onto dredging the eggplant into a Smoked Paprika breadcrumb mixture, later to be deep fried. While I on the other hand was struggling with the dough, on the verge of almost a mini-panic attack. Thankfully in walked two of our dear friends with vino, smiles and helping hands. Together we all quickly went to town manning almost assigned kitchen stations and managed to pull it all together. Thanks again guys!

BACKPACK BEES SUPPER CLUB MENU:

Rolls (Thanks Danny & Katie)

Fresh Greek Salad

Lemon Parsley White Bean Salad (Thanks Mandy)

Breaded Smoked Paprika Eggplant Bites

Vegetarian Homemade Ravioli -Stuffed with Ricotta, Shiitake Mushroom and Spinach Topped with Homemade Tomato Sauce

Homemade Vanilla Bean Ice-Cream

Homemade Strawberry Basil Ice-Cream

Homemade Apple Tart (Thanks Megan)

Who’s joining us for dinner next?

Backpackbees

Click, Ship & treat yourself!

Indulge: Seared Steak with Green Peppercorn Sauce

Shashin Error:

No photos found for specified shortcode

Shashin Error:

No photos found for specified shortcode

Shashin Error:

No photos found for specified shortcode

Shashin Error:

No photos found for specified shortcode

I have to admit, the weekends are rather sacred to me. Actually, thinking about and envisioning the weekend is often the only thing that gets me through my Monday through Friday’s. I’m hopeless, I know. I look forward to that time that I can just rest, recover and reconnect with the Mr. This past weekend my special moment just so happened to be over a truly perfect dinner prepared and cooked right in our own kitchen!

Shashin Error:

No photos found for specified shortcode

We picked up this Emeril by All-Clad E6019764 Cast-Iron 2-Burner Reversible Grill Griddle, Black
for our gas stove and seared some steak. It worked out rather nicely and the sirloin was medium perfection! We then dipped the steak into a secret sauce! It’s all about the sauce, ’bout the sauce’, yah baby! (Sorry I hear this song on re-play all day at work). If you follow along on Instagram, you know about THE secret sauce. Half of me wants to be selfish and keep this sauce to myself, butttt what fun would that be? None, so of course I’ll share with all of you!

Hope your taste buds are prepared to p-a-r-t-y! I’m not the biggest meat-eater, but even my taste buds were cheering!

Shashin Error:

No photos found for specified shortcode

Shashin Error:

No photos found for specified shortcode

Seared Steak with Green Peppercorn Sauce

Ingredients:

4 Filet Minion (or your favorite 8oz cut)
3 garlic cloves minced
½ cup heavy whipping cream
1 cup whole milk lactose free
½ Tsp smoked paprika
1 Tbs Hungarian paprika (use 2 Tbs if not using smoked paprika)
4 Tbs Madagascar Green Peppercorns in brine
(use 2 if sensitive to pepper)
1 Tsp white fine ground pepper (can substitute black fine ground pepper)
1 shot / approx. 3 Tbs Sherry (can substitute a mixture 2 Tbs Brandy 1 Tbs red wine)
Course Ground Pepper
2 shallots chopped finely
Kosher Salt

Grind the following in a pestle:

½ Tsp Fennel Seed
½ Tsp Oregano
½ Tsp Rosemary

THE Sauce:

In a skillet sauté onions and 1 clove of minced garlic, do not let burn. Just before garlic browns pour in Heavy cream and milk and sherry. Add green peppercorns, 1 Tbs Hungarian paprika, ½ Tbs course ground pepper, 2 pinches salt. Reduce the sauce to about ½ original size and keep it on VERY low heat to prevent a skin forming while temps true slowly cools and helps prevent from over cooking.

Prepare the Steak: (sauce needs be ready prior to cooking steaks)

In a small bowl place:
2 cloves of minced garlic
½ Tsp smoked paprika
½ Tsp white pepper
2 pinches of Kosher Salt

Now dump in the ground pestle mixture from above and shake/ stir so the spices coat the garlic and set aside.

Now that the garlic is flavored, press the garlic pieces into the steak using your hands, or a tooth pick if there are larger pieces. Don’t be scared to get those fingers a bit messy! Top each side of the steak with a pinch of salt and coarse ground pepper to your taste.

Next, make sure the grill, or cast iron skillet is heated to med-high heat. Place steak on grill for 2 minutes (reduce time if stove temp is too high) Rotate (DO NOT FLIP) steaks 90 degrees for 1 minute.
Then flip the steak and cook for 2 minutes, Repeat and rotate the steaks again 90 degrees, cook for 1 minute. Serve & eat!

Backpackbees

Click, Ship & treat yourself!

January blues and Crème brûlée

It’s not boo-hoo blues, it’s that the month of January always seems to linger… It’s the month where the major holiday hype has now officially come to an end and that once glittery sparkle of the wintry wonderland is just plain over, your left missing family and friends again, plus you’ve finished all your holiday cookies…uh -oh! (Perhaps that’s just me?) I came across this article and thought it really applied too, especially with its statement on only having the will to get out of bed for nothing less than a strong cup of joe.

Recently we were experiencing fairly decent temperatures, actually getting away with 3 layers and not 5, but then we got hit with a freak snowstorm that gave us a few more inches. Lucky us, right? Adding another layer back on as we speak. How’s the weather in your neighborhood?

I don’t know about you, but I feel like the month of January really needs some cheering up! It needs some pizzazz to lead us into the giant heart-shaped month of February…Yeah! Such an occasion calls for something cheery like…..like…..crème brûlée!

I’ve never attempted to make crème brûlée before, but after watching various YouTube videos, reading, etc. I felt fairly confident that I could pull it off. Seriously, it was the best decision ever, because it turned out perfect! The best part is I get to share with you all now!

Very Easy Creme Brûlée

Ingredients:

2 cups Whipping Cream
3 large eggs
½ cup sugar (also extra for caramelizing on top)
¾ tsp vanilla extract
4 Ovenproof ramekins
1 kitchen torch

Instructions:

Pre-heat your oven to 300°F

Heat whipping cream in a sauce pan, almost bringing up to a simmer. Please make sure to stir frequently.

In a bowl, whisk together 3 eggs and ½ cup sugar until well blended.

Very slowly stir in hot cream and vanilla extract, so you are not left with scrambled eggs to deal with.

Next, strain mixture through a mesh sieve into something with a pouring lip. Then divide the mixture into 4 ramekins and place in a large cake pan.

Fill the cake pan with very hot water halfway up the sides of the ramekins. Carefully pop everything into oven.

Bake at 300˚F for 35 minutes. Once they are done, you will be able to tell if the brûlée is set but still has a slight giggle to it, remove ramekins from cake pan and water.

Cool the ramekins at room tempted, then place in refrigerator to chill.

Let’s Talk Caramelization: (my favorite part)

Once brûlée is chilled, take out of refrigerator, sprinkle 1/2 to 1 tsp sugar on each custard ramekins. Then with your hand swirl to ramekins around in the air to evenly distribute and spread sugar.

The moment you’ve all been waiting for…..torch the top! Make sure to move the torch in a circular pattern until the whole surface is caramelized just as you likely . YouTube a video if this is your first time to assist with your torch confidence.

Happy eating and don’t forget to share how your creme brûlée turned out!

Backpackbees

Click, Ship & treat yourself!

Rosemary in my what?

Rosemary in my COOKIES! YESSS! If you’ve been watching our Instagram account you’ve seen that I’ve picked up some new light cookbook reads. Now…I can no longer hold it in, my current cookbook obsession is, Isa Does It: Amazingly Easy, Wildly Delicious Vegan Recipes for Every Day of the Week by Isa Chandra Moskowitz! Isa seriously has me hook line and sinker with these cookies. I turned into an instant cookie monster not even wanting to share with Mr. B. My family knows I am the first to snub most chocolate off, but the addition of rosemary to a cookie really caught my attention. Oh and guess what? IT’S VEGAN!

These cookies were perfect and in every way, just as Isa described they would be, buttery, golden, and wake your taste buds up with the exotic happy marriage of semi-sweet chocolate chips and fresh rosemary. Trust me folks, be forewarned, you are going to instantly become obsessed with these cookies too!

Don’t fret if you think it’s going to be all complicated because it’s vegan and possibly an unknown territory. It’s actually really easy and we had almost everything we needed on hand already in our kitchen. I only had to modify one partial element of the recipe and that was the coconut oil. Isa’s recipe calls for refined coconut oil, I only had unrefined but didn’t let that stop me and certainly didn’t change the taste as far as I am concerned.

Rosemary Chocolate Chip Cookies
Link directly to source: Post Punk Kitchen

1/2 cup refined coconut oil, softened (I used unrefined)
2 tablespoons lightly packed, chopped fresh rosemary (Chop it FINE)
1/4 cup granulated sugar
1/3 cup light brown sugar
1/4 cup almond milk (or your favorite non-dairy milk)
1 tablespoon ground flax seeds (golden preferred)(I used Bob’s Red Mill whole ground flaxseed meal)
2 teaspoons pure vanilla extract
1 1/3 cups all-purpose flour
1/2 teaspoon salt
1/2 teaspoon baking soda
1/2 cup chocolate semisweet chips

Instructions:

Preheat oven to 350 F. Lightly grease two large baking sheets.

In a large mixing bowl, use a fork to beat together the coconut oil and rosemary, until relatively smooth. Add the sugar, and beat for about a minute.

Add the non-dairy milk and flax seeds, and beat once again, for 30 seconds or so. Mix in the vanilla.

Add about half the flour, as well as the salt and baking soda, and mix well. Add the remainder of the flour, along with the chocolate chips, and mix well until it looks like, well, cookie dough.

Scoop about 2 tablespoons of dough onto cookie sheets in rounded spoonfuls. Flatten gently with your hands. Bake for 10 to 12 minutes, until bottoms are golden brown.

Let cool on sheets for 3 minutes or so, then transfer to cooling racks to cool the rest of the way.

Thanks for getting me through the tough times Isa!

Not only is rosemary for remembrance, as you may have read in my prior post, our friends departed Korea earlier this AM and mother Korea decided to surprise them one last time before they were on their way… SNOW! It was surprisingly a decent amount of snow that settled in below on our streets, sidewalks and trees. I love looking our windows onto the glittery white rooftops munching on a cookie.

Backpackbees

Click, Ship & treat yourself!


More see you laters

Today I joined our friends for brunch at The Bakers Table in Seoul. As I sat there enjoying the Farmer plate, (sunny side up of course), it hit me like a ton of bricks that this was yet another couple of wonderful friends that we’d say our see you laters to (never goodbyes). Yes, in the early morning (SUPER EARLY!) this couple would be off to starting a new chapter, soon with a beautiful bundle of joy, in Malaysia together. We were grateful to have the opportunity to spend some time with them and to open our home up to them on their final nights in Korea.

You think after all of these years abroad it would get easier to see our friends off, but it isn’t. Every time we arrive at this point I always sit and wonder why certain people enter into our lives when they do. We all start off strangers, but end up meaning the world to one another, with this link and strong bond. We know we will see you guys again very soon and cannot wait to welcome this beautiful baby into the world with you as well! Cheers!

Backpackbees

An Edible Roundup

No recipes tonight folks (we will start to share again soon)… We’ve just been having a good old time in the kitchen, no pressures, kicking off 2015 right! We’ve been cooking from scratch and eating at home a lot lately. We hope your kitchen’s been treating your belly well too! We’ve been getting asked a lot lately what we’ve been whipping up and eating. Since you asked for it, we will give you an edible roundup. In the famous words of Julia Child, bon appétit!

Backpackbees

Click, Ship & treat yourself!

2015: Cheers to the New Year!

Whew! 2014 was definitely a roller coaster of a year! There were really incredibly sweet moments and memories made and then of course some doughy times too.

Along the way I’ve learned that life is like baking a loaf of homemade bread. Each single ingredient put in is vital and important because that’s what helps bake and form the loaf in the end. Sometimes in life the ingredients just don’t seem to come together correctly and you get disappointed, or discouraged. You start to think maybe I should dump this damn thing and start over, or question if was a waste of time from the beginning. But you know what? The great news is if you don’t toss in the towel and you let all the ingredients mix and knead, give a little time to bake, it ends in a great crusty loaf! I mean, come on, ending up with a freshly baked loaf of bread in my book is something to be thankful for, am I right, or am I right? Wink-Wink.

So if 2014 was a roller coaster of a year for you as well, know that 2015 might be your best mix of ingredients to come! For 2015 let’s all wake up together in the new year thanking God for giving us yet another day, a day to enjoy another slice of our fresh loaf!

With that being said, who is popping by for some freshly baked whole-wheat honey cinnamon raisin bread? If you can’t make it we highly recommend using some of that Christmas dough on a swanky bread machine like we did (Psstt… IT’S ON SALE TOO!) I don’t think that we will ever purchase another loaf in the store unless in a pinch. Thank you Williams-Sanoma.

Here’s to the greatest mix of ingredients to come!

Happiest of New Years to you and you and of course you!

Honey Whole-Wheat Cinnamon Raisin Bread
Source: Breville Food Thinkers
Makes one 1.5-pound loaf
Ingredients:
1 cup warm water
3 tablespoons honey
1 1/2 tablespoons unsalted butter cut into 1/2-inch pieces, room temperature
1 1/4 teaspoons salt
1 1/2 cups bread flour
1 1/2 cups whole wheat flour
3/4 tablespoon ground cinnamon
2 3/4 tablespoon milk powder
1 3/4 dry active yeast

Add to the fruit and nut dispenser: 1/3 cup raisins

Instructions:
Ensure the collapsible paddle is attached in the bread pan and is in the upright position.

Add the ingredients to the bread pan in the order listed above, then secure the bread pan into the bread machine.

Place the raisins in the fruit and nut dispenser. Select the Whole Wheat setting, the desired crust color, and the 1.5-pound loaf size, then press start.

When the entire cycle is complete, use an oven mitt to remove the bread pan from the machine via the handle, and allow this to cool before removing the bread from the pan. The bread will slice best once completely cooled.

Backpackbees